Showing posts with label Desserts. Show all posts

Monday, December 27, 2010

Apple Pie Puffs

I am lost to the power of suggestion.  If I see it on a commercial, I usually can't get it off of my mind.  As we were walking through the frozen food section of the grocery store yesterday, Charlie noticed that the packaging on Mrs. Smith's pies had changed.  I noticed that there was an Apple Spice Pie that looks so delicious that I had to have it.

Knowing full well that I would not be able to eat more than a bite and Charlie is trying to cut back on his sugar, I walked away from it.  But darn, my mind wouldn't walk away from it.

As we sat and watch the Houston Texans figure out another way to lose a football game, I decided I would make my own Apple Spice Pie.

I had puff pastry, No Sugar Added Apple Pie filling, Raisins, splenda, cinnamon, nutmeg, ground cloves and butter.

Remember that I am winging this so of course, I didn't write down any measurements.  But don't you think that something like this is a matter of personal taste?  I like more cinnamon, Charlie likes a little more sweetener.  We meet in the middle and isn't that the way it is supposed to be?

The No Sugar Added Apple Pie filling already had some splenda and spices in it but it was a bit bland so I jazzed it up with a little more splenda, cinnamon, nutmeg and cloves.  Mix it up, added the raisins and got the taste approval from Charlie. Then we moved on to the pastry.

I then, rolled out the puff pastry to a piece large enough to get 12 squares that were about 3" x 3".  You want them to fit in the muffin pan without too much left hanging on the side.

Put the pastry in the muffin pan, fill with the apple mix, dot the top with a small pat of butter.  And voila, Apple Pie Puffs.

Bake them at 375 degrees for about 15 minutes or until they are browned all around and the filling is set.  Ok, I was watching Peyton Manning win another game and actually run with the football so I didn't pay alot of attention to how long they were in the oven.  When the kitchen was filled with a wonderful apple pie smell, I went and checked them.


We made a little whipped cream for the top and wow, I bet they could give Mrs. Smith a run for the money.

The pictures don't really tell the story of how good they are.  And remember, the filling is sugar free.  That makes me smile even bigger.

Live, Laugh, Love.
Karen and Charlie

Friday, December 24, 2010

Vintage Sugarcube's Peanut Butter Fudge

I came across a blog yesterday that was exciting. I love anything retro or vintage, so when I saw the name I had to visit. Wow, I was blown away. This girl is grand. You can visit her at ttp://www.vintagesugarcube.com/.  I'm sure you will enjoy it too. 

The thing that caught my eye at first was the 2 ingredient peanut butter fudge.  I have been lazy this year and haven't made fudge yet, much to James' dismay.  However....how could I not try something as simple as peanut butter and frosting.  So I jumped right up and got to it.

And then I jumped right in the car because we had about 1 teaspoon of peanut butter left in the jar.

Oh well, I needed a few other things too.  But don't you just hate when you have 6 items and the person in front of you has, oh about 30 but they think it's ok to get in the express checkout lane.  That drives me insane!

Enough about my insanity, back to the fudge.

Please take notes.  You might not get this on the first try.  Put peanut butter in a microwavable dish and melt.
It takes about 30 seconds.  You will notice that I am using the vitamin and iron fortified peanut butter.  If you are going to indulge, please do it properly.

Alright, I really don't think you could eat enough of this to make a difference with the vitamins and iron.  I just thought it was kinda funny that they have to up the anti on peanut butter...the perfect food.


After you are sure that you handled the first step, we'll move on.

Grab some vanilla frosting in a tub.  I used Duncan Hines because that's just what I had.  I'm not even sure why it was in the pantry, I guess it was is a Christmas Miracle.  Anyway, put that in a dish and zap it for about 30 seconds.

You will notice the streaks of peanut butter running through the icing.  I figured since they are going to get stirred together later, I'd have less dishes to wash if I used the same spatula for both.

See, I'm always planning.

Ok, the hard part is over with.

Mix the melted peanut butter and melted frosting together.  You get to pick which bowl you pour into.  My peanut butter was already getting thick so you have to do this right when you take the frosting out of the microwave.  Mix it well.

Use your favorite prep method for the pan.  Butter it, wax paper, foil, whatever works for you.  Then pour the combined mixture into the prepared pan.

Try to not lick the screen. 

As you can tell it has already started setting up.  Put it in the fridge until it is firm.

Cut it into pieces and enjoy.  These pieces are actually too big.  While it isn't an overly sweet fudge, it is still fudge.  One by one squares are a good size, I usually get carried away and go bigger.

In case you needed more convincing.  Let's review...Few ingredients, fast prep, not too many dishes to wash, tastes great.  It's a winner.  Thanks Vintage Sugarcube!


A great look for serving your Peanut Butter Fudge!
Large Tree Dish, 11

Sunday, November 28, 2010

My Mother's Pound Cake

When my Mother unexpected passed away in 1999, I was fortunate enough to get her recipe box.  I always loved that little, green metal box.  And I still do.

My Mother is alot like me.  If I know something, then it doesn't need to be written down because I'm probably the only one that will need it.  On many of her cards, she only has the ingredients.  No instructions.  Did you hear that...you get to guess.  Luckily on this one she went back and added baking time but that didn't happen on all of them.  I think it's cool.  Kind of adds to the fun of going through that little metal box.

You can see the what you need above.  I did switch lemon extract for the coconut.  It doesn't really change any flavor.  I creamed the butter, shortening and sugar.  Mixed the dry ingredients. In a separate bowl, slightly beat the eggs and add the milk.

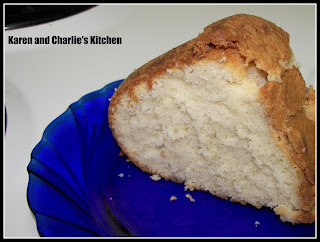
Alternate adding the dry and wet ingredients to the creamed butter, starting and ending with the dry.  Pour into a greased and floured bundt pan.  And this is what you get...

Indulge me for a minute.....

And maybe another minute.  You might want to pour a cup of coffee to go with this delicious cake.

I'm loving it.  How about you?

Sunday, November 7, 2010

Blackberry Cobbler

Please don't think I'm crazy because it definitely isn't berry season but I had a request for a blackberry cobbler and I could resist.  I have a love-hate relationship with frozen fruit.  They always seem mushy to me.  I'll make smoothies with them but that about it.  So enter the dilemma.  It's November, where do I get fresh blackberries? 

Well, ya don't.  You suck it up and use frozen. I am ashamed, very ashamed.  But here's how it went.

Blackberry Cobbler
Adapted from The Pioneer Woman

1 stick butter, melted
2  cups blackberries, thawed
1 cup flour
1/4 cup sugar
3/4 cup splenda
1/2 tsp vanilla
1 cup milk
1 teaspoon baking powder
1/8 teaspoon salt

Mix together dry ingredients.
Add milk, mix.  Add melted butter and vanilla. 

Grease 8 x 8 baking dish.  Use butter or cooking spray, whatever works for you.

Rinse the berries and dry well.  Pick out the squishy ones.  Well, you don't have too but we've already talked about the mushy fruit problem I have. 

Pour the batter into the baking dish and top with berries.

Bake in a 350 degree oven for 45 minutes.

It's cake like and fluffy and the berries were actually pretty good.  The person that requested it has some problems with sugar so I adapted the recipe to use splenda.  I found that if I use all splenda it doesn't brown correctly.  It worked out well and she loved it.  Told me it was just what she had been craving.